A hearty welcome to SanDee&amelie's challenge blog!

Please, note, that this challenge blog is not related to any business and run without any profit by people, who do this for your and their own leisure time fun! Our only reward are your encouraging comments and your playing along and sharing steampunk fun and mixed media techniques. We appreciate every single entry and comment so much! Thank you for taking the time!

If you are new to this place, please, know that we are so glad that you stopped by our little steampunk corner!
Whether you are a dedicated tag or card maker, art journaler or mixed media lover - this might be the right place for you!
For more information about the rules and the little "steampunk/industrial twist" we ask of you, please check the "about" stuff and then simply jump in and create!

If you are new to steampunk and not sure if this is "your thing", maybe take a look at our winners gallery on pinterest (use the linking button on our side bar). You will find that we're mainly a mixed media challenge blog with a little twist towards steampunk, industrial and/or vintage. So why not give it a try?

We are looking forward to seeing your fab projects entered to one of our challenges soon!


Hugs,
SanDee&amelie&the SASPC team

Saturday, June 27, 2015

Extra Steam Power #2

Hello and a very joyful welcome back to another inspirational Extra Steam Power (short "ESP") post!

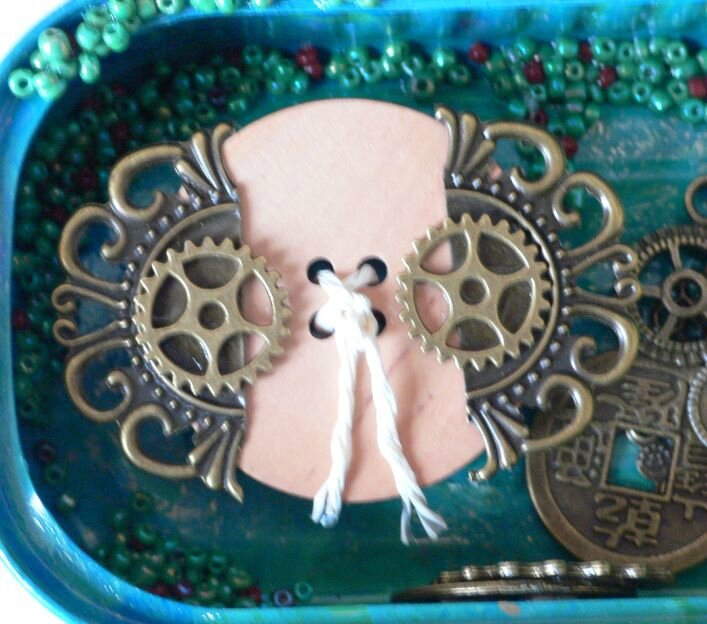
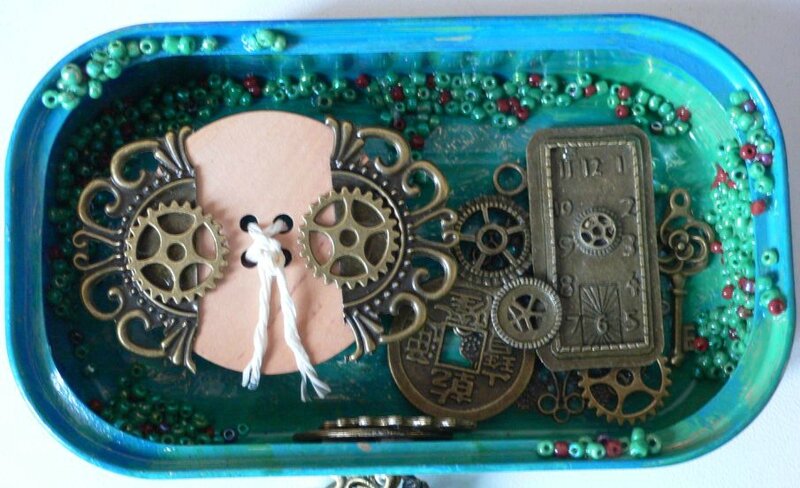
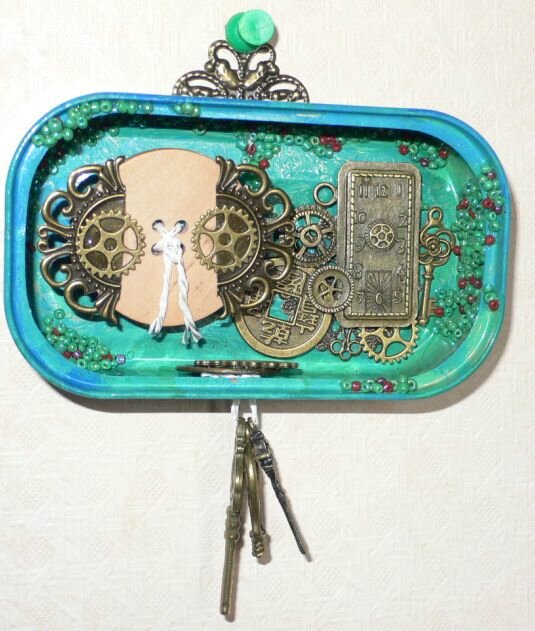
This time Brigitte from La maison de coutureuse has done her very unique magic on an old tin! I LOVE altering tins and hers looks absolutely brilliant!
But before I offer you this gorgeous steampunk eye candy I want to remind you that there are still three more days left to enter our actual "The Ravages of Time" challenge and by doing so get eligible for a fab prize win sponsored by Inspiration Emporium!

But now the stage is yours, Brigitte! Applaus, applaus, applaaauuuusssseeee!(doing my Kermit the Frog waving-about).


***


Une boite de sardine à la sauce steampunk/
Sardine can with steampunk salsa

finie 2


Ma recette:
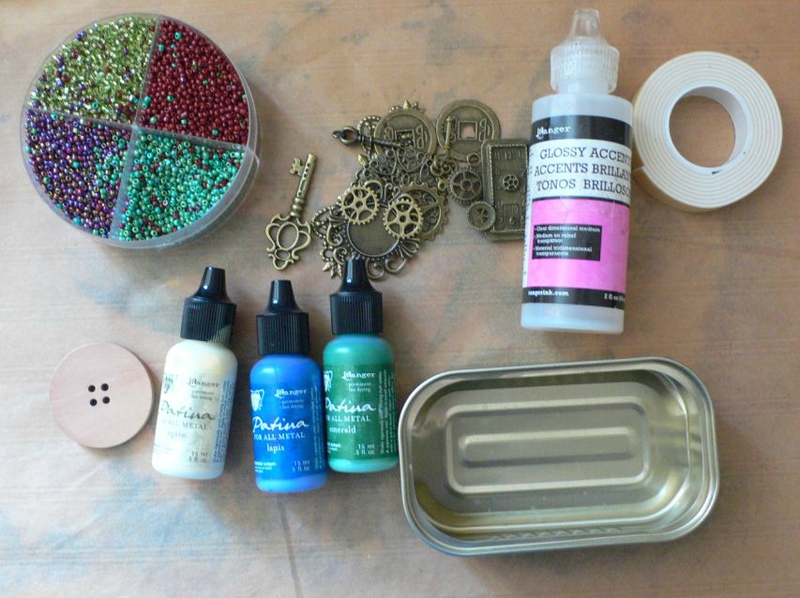
Les ingrédients : boite de sardine vide et propre, des breloques,
un bouton en bois, des peintures pour métal, du glossy pour coller,
des perles, du double face épais pour 3 D


My recipe:
Ingredients : sardine can empty and clean, charms,
wood button, paint for metal, glossy accents for glue,
beads, 3D sticky foam


fournitures


La préparation :
 faites un trou dans un côté de la boite,
peignez la boite en mélangeant les 3 couleurs, intérieur et extérieur, laissez sécher.
Collez des perles ici et là avec le glossy, laissez sécher.

Preparation : 
make a hole in one side of the can,
paint the box with the 3 colors mixed, inside and outside,  let dry
Glue some beads with glossy, let dry

Pour le bouton : 
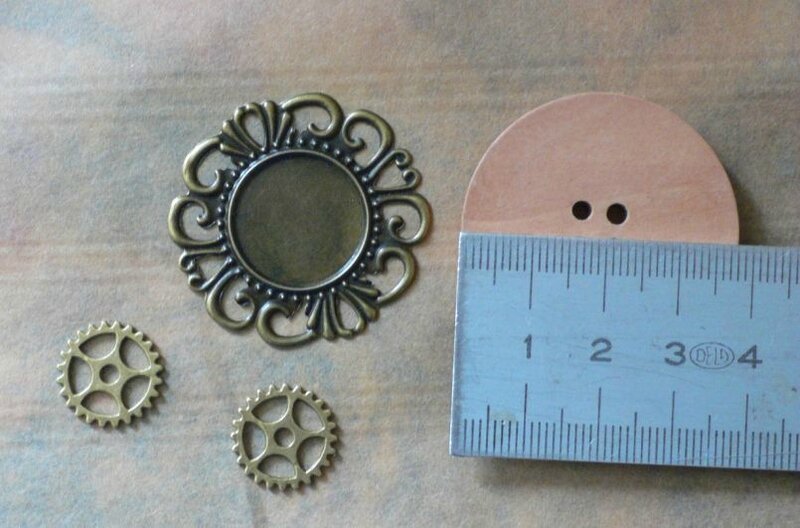
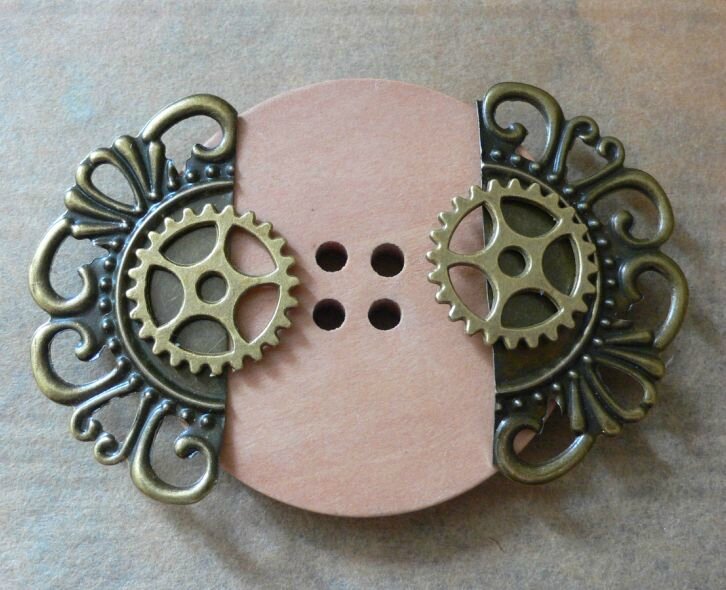
découpez au milieu une breloque ronde, 
collez sur l'envers du  bouton,
collez des petits engrenages, 
passez un morceau de fil dans les trous.

Button : 
cut a round charm in half, 
glue to the button,
glue on smaller cogs,
finish with a piece of thread in the holes.


bouton
bouton3


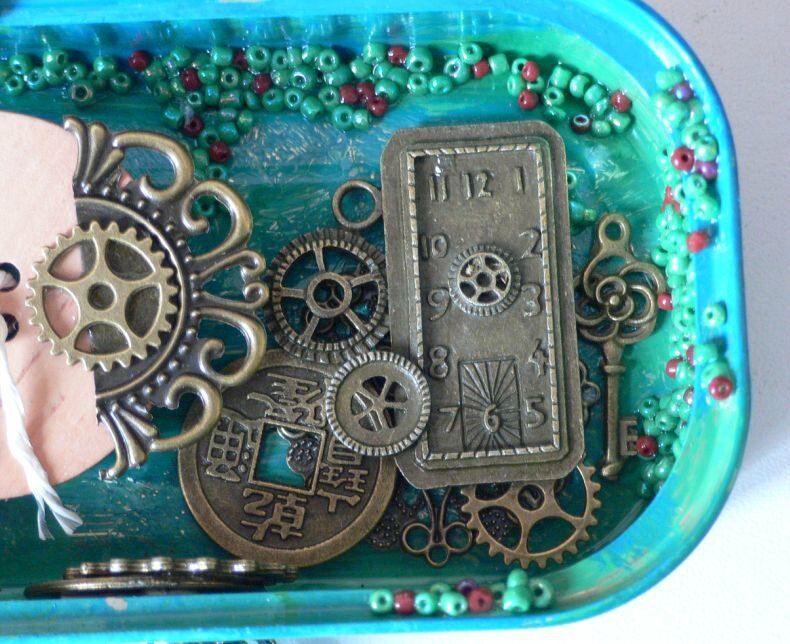
Quand la boite est sèche collez à droite des breloques l'une sur l'autre,
la dernière breloque est collée sur du double face épais.

When the box is dry, glue charms on the right,
for the last charm use the 3D foam


côté droit


Collez le bouton sur de la mousse puis collez dans la boite.

Glue the button on the foam and after in the box


2


Ajoutez quelques breloques sur un fil, passez le fil dans le trou,
nouez le fil à l'intérieur de la boite. Cachez le noeud avec 2 breloques collées dessus.

Add some charms on a thread, insert the thread in the hole,
make a bow in the box. cover the bow with charm


1


Au dos collez une dernière breloque qui servira d'accroche.

Glue a charm to the back of the tin to use as a hanging device.


Et voilà, bon appétit !!!!!!!!

espbanner1


***

Hugs and happy crafting,
Claudia & the SASPC team
xxx
Saturday, June 20, 2015

Extra Steam Power #1

Servus and a heartfelt welcome to the start of a brand new feature over here on our challenge blog, dear arty steampunk friends and crafters!

From time to time we will share some additional steampunk projects done by our DT that are not related to the actual challenge theme - simply to provide you with additional inspiration and share additional steampunk fun and joy. We want this little steampunk corner (and our new facebook group) to become a spot where you will always find new ideas and inspirational fuel for your own steampunk art!

Our actual challenge "The Ravages of Time" is open until the end of the month. To find out more about it click the badge at the top of our side bar that leads you to the actual challenge. If you want to check out the makes of team B, just scroll down to the previous post.

But now on to our very first post for this new feature which is from lovely Laura from Laurart! I am sure you will love this to bits! I definitely do! ;)

***

Welcome to the first Extra Steam Power post at Sandee and amelies Steampunk Challenges.


Today I would like to share with you a rusty Steampunk style creation....


       Everyone should watch Andy Skinner videos - every time I do I always rush off to try out the techniques he so brilliantly does. Usually when I watch demo videos I never have the items that are being used and I have to try and find a substitute (or impatiently await a craft order!) but this time I was in luck...I had asked my wonderful friend Claudia to suggest some Decoart items that she thought I would love to use and I ordered them....and of course the items Andy used were on the list!... and they had arrived the day before...how is that for good timing?!

       I really do recommend that you watch the three videos....I will be giving an explanation of what I did with just one of the techniques...but you really should watch what Andy does. I spent a whole morning having a great time playing around with all three of the techniques (and variations of - lets face it not everything goes to plan all the time - but even mistakes can be tweaked) and so I ended up sitting there with about six future projects - all rusted and ready to be put together.

Easy Rust Painting Part 1 


     Today I am showing you what I made with my favourite one of the three techniques....
 Andy used embossed chipboard for this rust technique. I didn't have any, so I got this cardboard photo frame and covered it with texture paste through an Andy Skinner stencil -I adore this stencil!!!


 After leaving it to dry I then followed Andy's instructions to rub some Sand Texture Paste on it.


 I love any crafts that get messy so this was wonderful. I left it to dry and then followed Andy's instructions to mix Paynes Grey with white - I chose to go slightly lighter then he did in the demo...I intend to experiment with different tones and see what happens...I also want to see what effects applying more of the sand texture paste does...this technique has so many possibilities!
       Then a wash of diluted Paynes Grey (I need this paint in bucket size!) I brushed the wash over and then loaded the brush with the wash and dabbed it over the frame to form darker patches.
      When this was dry (and already looking really gorgeously grungy - the texture paste is amazing!)  I began to cover it with Quinacridone Gold....I love this paint...I had used it before on my own rust techniques (that sadly could never match this for texture and realism) but it transforms into glorious shades of rust when brushed over Paynes Grey! It is magic!!!
     I wanted the rust to be patchy...not a dense colour. So I decided which areas I wanted the rust to be the lightest and just very gently dry brushed over the parts, leaving parts of Paynes Grey uncovered.


Then I covered the rest of the frame with Quinacridone gold, heavier in some parts than others. When this was dry I covered the frame with a couple of coats of Ultra Matt Varnish - this removes any sheen from the paint and makes the rust look even more realistic...


I used one of the Found Relatives photos and added some little scenic photographs from some printed paper


I decided to keep the colour scheme to grey and brown so I chose silver with bronze and rusted embellishments. Included in this was a rose that I had covered in rusting powder, an old rusted key, various cogs and gears, a rusty heart and a silver clock


I added some bronze hinge fasteners and some rusty wire so that the frame could be hung up


And there it is.....I will certainly be using this rust technique over and over again...it was so much fun and very easy!
    Please do check out Andy's demo videos - and if you don't have the products then place Quinacridone Gold, Paynes Grey and Sand Texture paste on your shopping list asap! - You won't regret it! ;o)
        Thanks so much for being here! I hope I have inspired you to try out some Steampunk creations! 
Our challenge this month is 'Ravages of time' and rust just fits in so well....why not get a bit rusty and join us?
Happy Crafting!
Laura
xxx


Monday, June 15, 2015

The Ravages of Time - Mid-month Reminder

Servus and welcome to the mid- month reminder of our actual challenge "The Ravages of Time" which asks for aged and worn looking effects and designs...maybe a little (or a lot of) rust, some crackle here and there or some peeled paint or wallpaper creations? Patina, lichen, corroded metal,....well, the list is far from being complete yet but I am sure you will find your personal favourite for this theme (and hopefully enter a project to our challenge before the end of this month)!

We already had a great bunch of awesome entries and are gobsmacked by all the talent out there! And we can't get enough of it! Seeing a lot of wonderful projects entered to our challenges really is the most wonderful reward for all the love and labour that's being put into DT work, you know? So let me say a huge "THANK YOU SO MUCH!" for playing along and for creating all the amazing art you enter with our challenges!

The ladies from team B have once more risen up to this challenge and created another fab bundle of inspirational goodness for you! But before I show you their creations just let me announce this month's prize sponsor which is once again lovely Joy from Inspiration Emporium, who are giving away a generous $25 voucher for shopping with their great online store! Thank you so much, Joy!

http://www.inspirationemporium.com/


But now on to the makes of team B! If you want to learn more about their projects just visit their blogs (by clicking their names) - and if you have a spare minute maybe leave them a comment to show them some appreciation! I am sure they will be very happy!


A challenge that is music to my ears...peeled paint and patina tinged rust was the inspiration for this weather worn creation and I loved every second of making it!


Kerstin

Rust, stains and peeled paint


The good old days, I remember me on the old bike of my Grandma, you hear it from afar, but it works till today,
it is something special, even though already the teeth of time has gnawed on it.


Dee


My piece is also like SanDee's inspired by Andy's work with my slant on it.
I went for the time worn look with patina's, rust  & decaying rust. 
Why not join in with us, we would love to see your take on 
this months theme.


If you like what I have created then Pop over to my blog to see
 how I made it. 


Niki @ Pawsitively Creative 

New Patina Technique


I knew I wanted to try my hand at doing a patina effect. I came up with this technique through trial and error and lots of sprays! This altered box was ravaged by paints, gesso, inks and so much more! Texture pastes played a huge part in making this Ravaged Clock!


As this tag gave me quite a hard time (by not turning out in any way I had planned at the start) I really "ravaged" it by painting it over several times, scraping on and off paints and media, soaking it with spray paints and various pastes, collaging bits onto it and tearing them off again...until I finally was content with the outcome. (*phew!)


***

If you haven't seen the makes of team A yet, you find them over HERE
Our challenge is open until the end of the month and you can enter up to three different projects. Each single (and proper) entry counts as a vote for the prize draw. Prize winner and top5 will be announced on a Saturday as usual - but this time on July 11th so there's enough time for the team to vote. 

You find the inlinkz collection at the bottom of this post or also with the post from the 1st of this month when we started the challenge. 

Hugs and happy crafting,
Claudia & the SASPC team
xxx


Saturday, June 6, 2015

May Top5 and Prize Winner

Servus and welcome back, dear Steampunk friends!

Summer has arrived - yay! Time to finally get fuelled with good vibes and new energy from loads of warmth and sunshine! Time for ice-cream and barbecues...but hopefully also a little time for crafty fun and for stopping by our little steampunk-ish mixed media corner from time to time ;)

Thank you for all the wonderful entries for our "Eyes Tested!" challenge - once more you showed us loads of imagination and creativity and chosing our Top5 was - once more - hard.

Picking the prize winner was a lot easier, as I got help from random.org....lol..and it picked...


nate!

Yay! Huge congratulations, nate, and please, contact me via email (the address can be found at the side bar) so we can send your Retro Kraft Shop voucher to you.

http://www.retrokraftshop.pl/en/


And now on to our well deserved Top5...drumroll.....to see an enlarge image just click on the images, to get to our winners' blog, click on their names:


Huuuuuuge congrats, ladies! You definitely blew us away with your imagination and the execution of your projects! Thank you so much for sharing your fantastic art with us! Please, feel free to grab the top5 badge for display on your blogs:


***

Our actual challenge "The Ravages of Time" has just started and is open until the end of the month! And of course we hope you will join in and have a lot of steampunk/vintage/industrial/shabby chique fun creating a project to enter with our challenge! ;) 

All details about the challenge can be found HERE (or you get to the actual challenge by clicking on the badge on top of our side bar). I also would like to invite you to check back on June 15th when we are going present the makes from team B alongside this month's prize sponsor!

In the meantime: 
hugs and happy crafting,
Claudia & the SASPC team!
xxx

Monday, June 1, 2015

"The Ravages of Time" - the June Challenge

Servus and welcome back to our little creative spot where we try to offer you some inspirational challenges with a Steampunk/Vintage twist!

If you are into mixed media, tag or card making, art journaling, painting, stamping or crafting in general or altering objects....if you love adding a slight industrial and/or vintage feel to your makes and love everything that has to do with gears, cogs and other mechanical stuff...this is the place for you and the challenge to join in! ;)


The challenge theme we have chosen for this month is

"The Ravages of Time".


Thinking of peeling wallpapers, rust in all its glorious forms of appearance, peeled paint, crackle, patina, weathered wood,....show us your interpretation of this theme and enter up to three projects... and by doing so get eligible for a lovely prize from one of our generous sponsors (each proper entry counts as one vote). The sponsor for this month will be announced alongside presenting the makes of team B on June 15th.

The prize winner and Top 3 to 5 from our May challenge will be announced on Saturday, 6th June. So make sure you come back and check if you are one of them!


But now on to the makes of team A, who have once more outdone themselves on providing you with wonderful projects to fuel your inspiration! For more details, please, visit my lovely teamies' blogs (for enlarged view click on the images).


"Sentimental tRUST"
 is an assemblage made with crackle, patina and rust.
More details on my blog


I have photographed my old company stamps as I found at a flea market.
And I think they should be used on a large manilatag.
See more on my blog


Agnieszka


Look closely - it's not a tag! 
It's an old wall, where underneath peeling wallpaper
secret blueprints of a mad scientist are hidden! ;)


What could show "The Ravages of Time" better than time itself. That is why I created a clock. I loved to play with this Mixed Media technique and DecoArt Products - so much fun and just amazing Products. By the way I got inspired by Andy Skinner. Really hope you like it. More details and a step by step of my Project can be found on my Blog.


A shadow box : Artist's studio

Timeworn techniques for the frame, vintage paint tube, paint brush, small cup...
The portrait on peeled and crackle cardstock is just an image
with embellishments
more on my blog


I needed to make birthday cards for my adult sons, and I thought as another year passes in their life journeys, maybe they are feeling the "ravages of time". Details are posted on my blog.


***

I hope you are as gobsmacked by my teamies' creations as I am! They really put such a lot of imagination and effort into their makes (which makes me the proudest challenge blog owner you can imagine). 

The challenge is open until the end of the month (please remember our blog has Central European Time!) and we are looking forward to seeing your timeworn and "ravaged" creations soon! 


Hugs and happy crafting,
Claudia & the SASPC Team
xxx